Configuration (CloudBoxx API / Classic)⚓︎
If you are using INVERS OneAPI, please use this documentation.
Video Tutorial
We have summarized the content of this page into short videos: Generic setup Specific setup
Selecting a CloudBoxx⚓︎
To start configuring a telematics unit, select it. You can do this in one of three ways:
Choosing from all available telematics units⚓︎
On the home screen, open the list of available telematics units under Configuration. Then, find the respective telematics unit and open its detailed view. Here, select Configure to begin configuration.
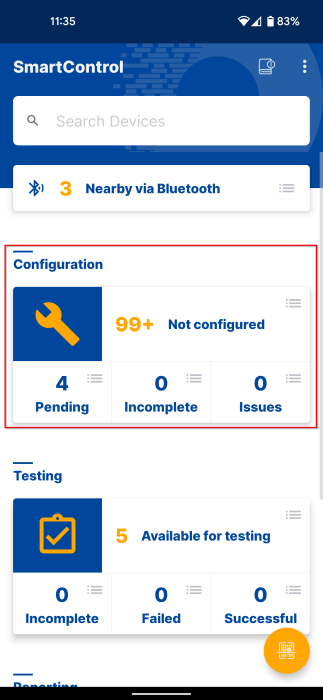
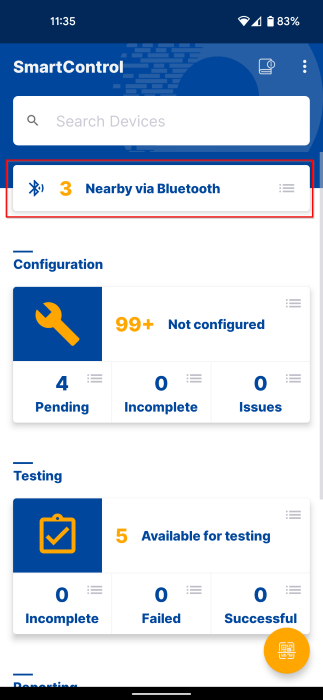
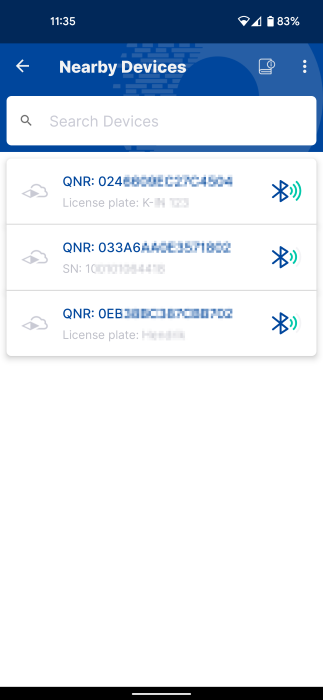
Finding nearby telematics units via Bluetooth⚓︎
SmartControl automatically scans for nearby telematics units via Bluetooth. On the home screen, select Nearby via Bluetooth to open a list view of all detected telematics units. Then, find the respective telematics unit and open its detailed view. Here, select Configure to begin configuration.
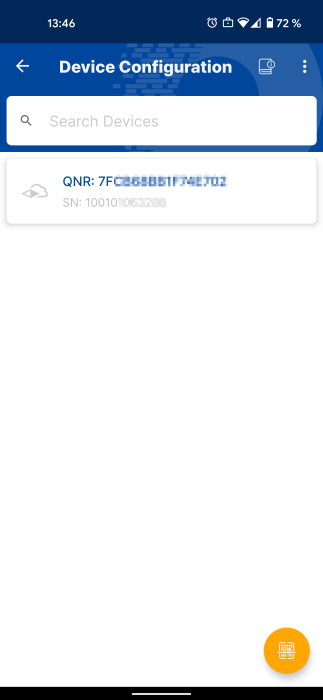
Scanning the CloudBoxx’s QR code⚓︎
Every CloudBoxx is marked with a QR code. You can scan this QR code by clicking the orange button in the bottom right corner on the home screen.

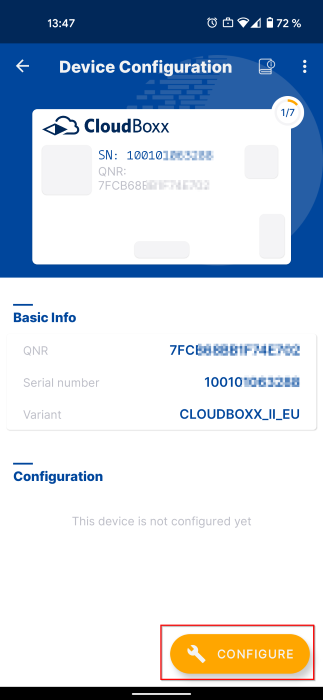
Configuration⚓︎
Important
The license plate and VIN of your vehicles must be unique within your fleet.
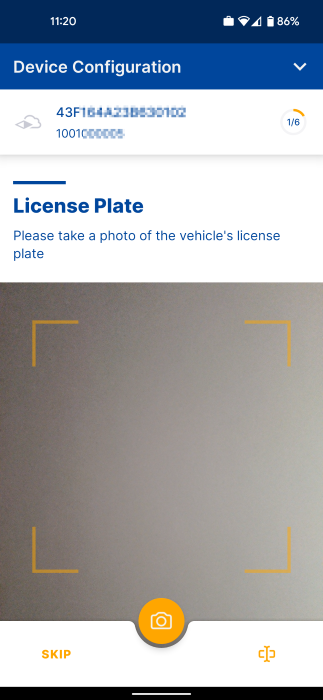
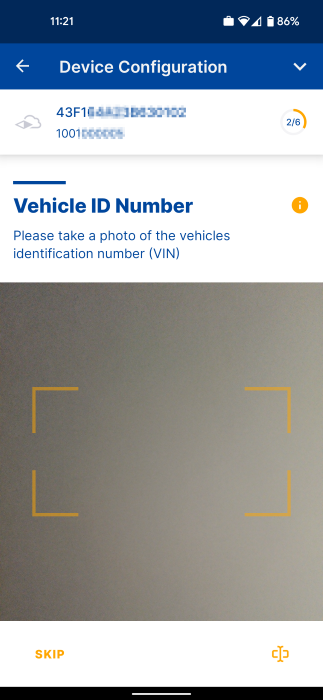
Follow the following steps to complete the configuration. Instructions for the configuration process are also provided in SmartControl.
Step 1: Scan the license plate using your camera or use the button on the bottom right to enter it manually.
Step 2: Scan the vehicle’s VIN or use the button on the bottom right to enter it manually.
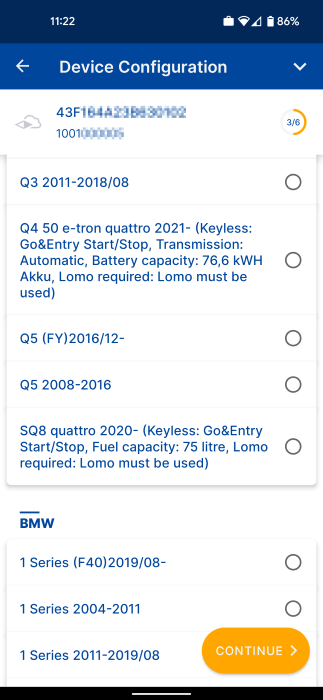
Step 3: Select the vehicle manufacturer and model. If you have previously configured a vehicle of the exact model and brand, you can instead apply a preset that contains a copy of that configuration.
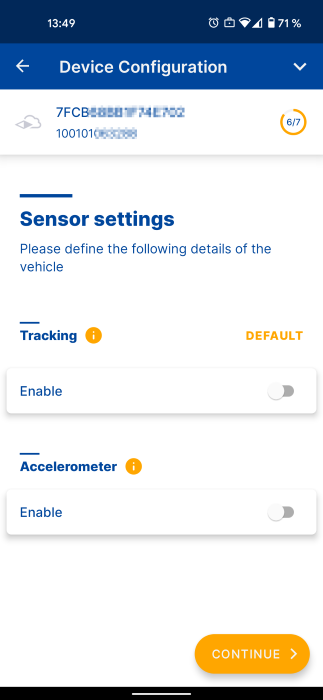
Step 4: In this step, you can enable the tracking and accelerometer functions for shock and motion detection.
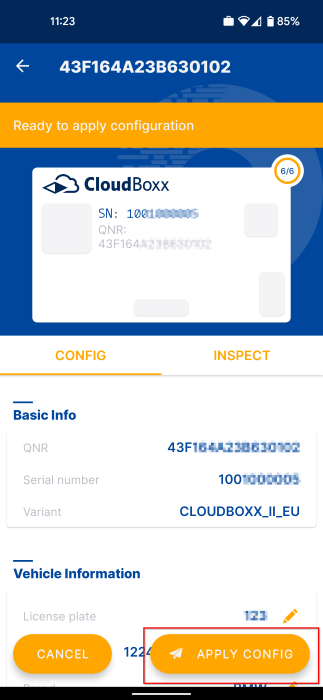
Step 5: Before you apply the configuration, verify all settings and then send the configuration by selecting Apply Config.
Reapplying configurations⚓︎
After you have successfully completed a configuration, you can apply the created configuration to other telematics units. This is useful if you are installing into vehicles of the same manufacturer and model.
RFID and Keyfob⚓︎
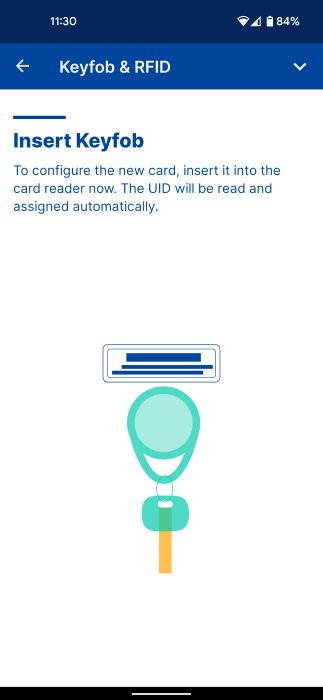
After completing a CloudBoxx’s configuration, you have the option to configure a keyfob and RFID cards. Select the respective telematics unit by searching for its QNR, scanning its QR code, or connecting to it via Bluetooth. Choose RFID & Keyfob. On the overview page, you can see the current status of the keyfob and both RFID tags. Select the entry you would like to configure or edit.
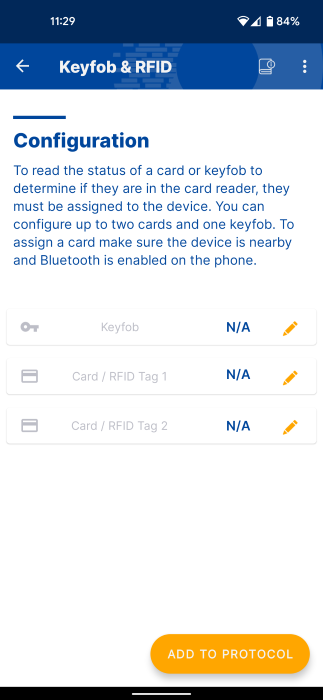
First, remove all RFID tags and cards from the telematic unit’s reader. As soon as SmartControl prompts you to do so, insert the tag or card you would like to configure. If the tag or card is recognized and configured correctly, SmartControl displays a confirmation. Otherwise, repeat the previous steps.