Overview
Manage your fleet in FleetControl using a table, a map, and a side panel. Filter and save presets, configure columns, run bulk actions, and switch between table and map without losing context.
Why This Page⚓︎
Use this page to:
- Find vehicles that need attention
- Act on many vehicles at once
- View live positions on a map
- Preview a vehicle’s health and details fast
At a Glance⚓︎
- Tabs: Table | Map
- Context panel: Opens when you select a vehicle (right side)
- Filters & presets: Apply in the table or map—your selection carries over
- Selection counter: Shows filtered total and how many vehicles you selected
Quick Start⚓︎
- Go to Vehicles.
- Open Presets and choose All Vehicles or a custom preset.
- Select Filter to open the Filter dialog. See Filtering › How Filtering Works.
- (Optional) Select Save as preset to reuse your filter later.
- Select vehicles (checkbox left of each row) to enable bulk actions.
- Switch to Map to see the same filtered set visually.
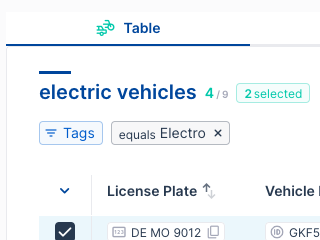
Filters & presets carry over
Apply a filter in Table, then switch to Map to see the same subset—and vice versa.
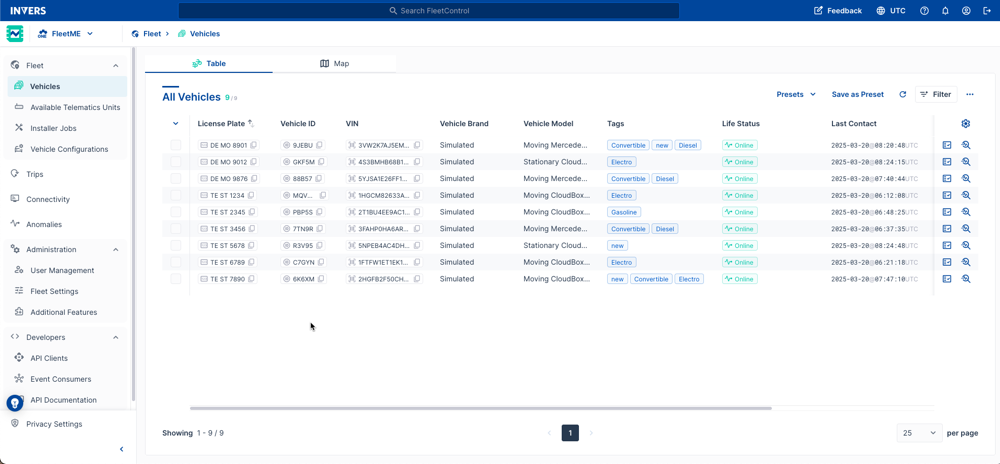
Table⚓︎
The table lists all vehicles in the current preset or filter.
Key Indicators⚓︎
- Green X: Count after filters (visible set)
- Gray Y: Total vehicles in your fleet
- Selected: Count of currently selected rows
Core Actions (Top-Right)⚓︎
![]()
- Presets: Load a preset. The table header shows the active preset name.
- Save as preset: Save current filters as a new or updated preset.
- Refresh: Pull latest data (e.g., firmware states, configs).
- Filter: Open the Filter dialog (advanced filter). Active filters appear as tags above the table.
- More actions (⋯):
- Add Vehicle
- Radius Search Filter
- Vehicle Configuration
- Update Firmware
- Edit Tags
- Edit Masterdata
- Archive Vehicles
- Export Vehicles (CSV)
Tip
Actions that affect vehicles (configure, firmware, edit, archive) enable only after you select at least one vehicle.
Column Tools 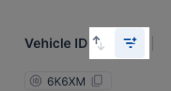 ⚓︎
⚓︎
- Sort: Select a column header to sort. See User Interface.
- Column filter: Select the filter icon on a column to add it to the Filter dialog directly. See Filtering.
Row Tools (Far Right)  ⚓︎
⚓︎
- Configure Table Columns (⚙️): Customize visible columns. See User Interface.
- Show Events: Opens vehicle Events
- Inspect Vehicle: Opens Inspect
Map⚓︎
The Map shows your filtered set as clusters and markers. On open, the map fits all shown vehicles. Zoom in to reveal smaller clusters and individual vehicles.
For map navigation controls (zoom, satellite view, POIs, home), see User Interface.
Use satellite view to check parking
Satellite view helps identify vehicles in underground or multistory car parks.
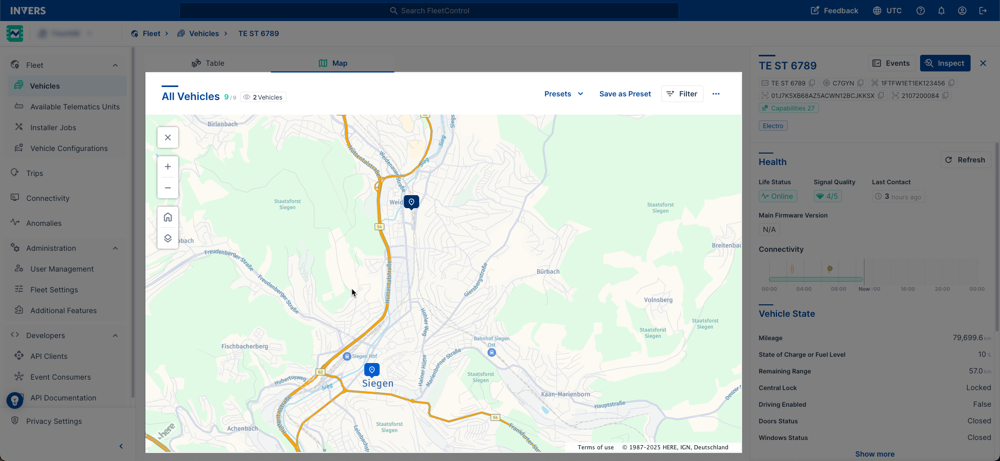
Side Panel (Vehicle Preview)⚓︎
Select a vehicle to open the side panel on the right. The panel works in both Table and Map views. For general side panel behavior, see User Interface.
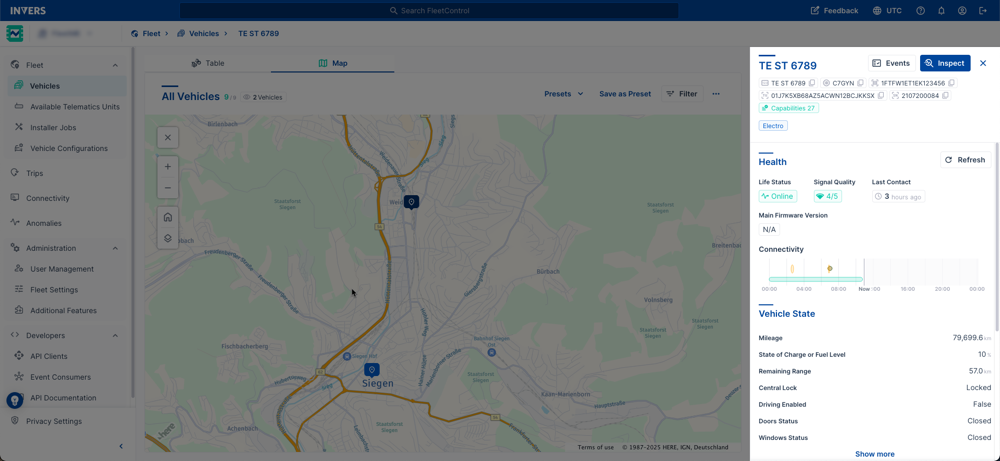
What you can do:
- View health, status, last position, and states (preview of Inspect)
- Copy values (Vehicle ID, telematics unit)
- Run Commands (where available)
- Select Show more to expand state details
For complete vehicle details and diagnostics, open Inspect.
Common Tasks⚓︎
Find Vehicles Due for a Firmware Update⚓︎
Use Filtering › Best Practice Filters (Outdated Firmware), then More actions (⋯) → Update Firmware.
Export Low-Battery Vehicles⚓︎
Apply the Board Voltage Below Acceptable Threshold (Low Battery) recipe in Filtering, then More actions (⋯) → Export Vehicles.
Locate Vehicles in a Radius⚓︎
- More actions (⋯) → Radius Search Filter.
- Set center and radius (e.g., 1 km / 0.6 mi).
- Apply.
- (Optional): Switch to Map to view the subset.
Build a Reusable Operational View (Preset)⚓︎
- Apply filters (e.g., Fuel Type = Electric, Life Status = Online, Operation Status = Maintenance).
- Arrange columns (pin License Plate, Fuel Type, Last Contact).
- Select Save as preset → Name it (e.g., EV Vehicles in Maintenance).
- Your new preset is automatically shared with your team for consistency.
Tips⚓︎
- Select all in view: Use the header checkbox to select all visible rows.
- Refresh after changes: Use Refresh to pull the latest firmware/config results to the table.
- Pin critical columns: Keep key data points (License Plate, Life Status, Last Contact) visible for faster scanning. See Configuring Columns.
Troubleshooting⚓︎
I don’t see my filter on the map. Make sure you applied the filter. Switch to Map; it mirrors the current table filter/preset.
Bulk actions are disabled (gray). Select at least one vehicle. Some actions require specific permissions or additional features.
My CSV export is missing fields. Add the columns you need before exporting. See Configuring Columns.
Related Articles⚓︎
- User Interface — Tables, filters, maps, and common controls
- Finding Vehicles — Global Search, Column Filter, Radius Search
- Filtering — Filter operators, data types, best-practice filters
- Adding Vehicles
- Configuring Vehicles
- Updating Vehicles
- Bulk Actions
- Events
- Inspect