User Management
Control access to your fleet with FleetControl’s User Management.
Invite team members, assign permissions, and review security settings to keep access safe.
Select a user to see their info, permissions, and two-step verification status in the side panel.
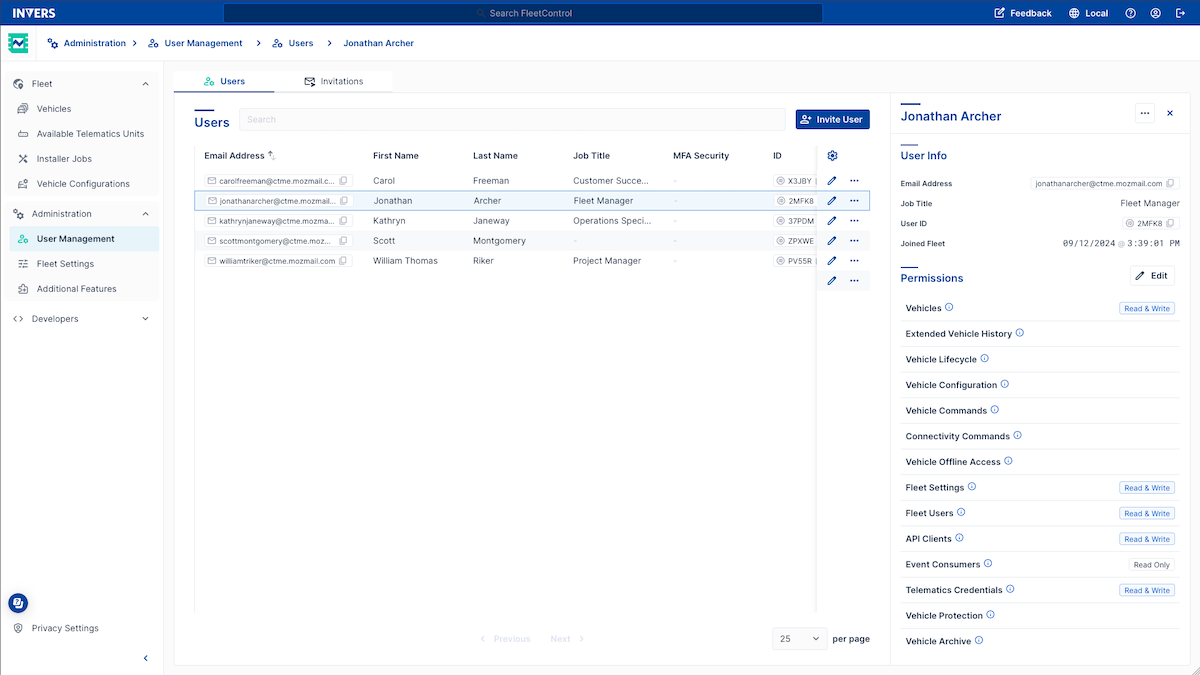
Users Table⚓︎
The Users table gives you an overview of everyone in your fleet. Each row shows:
| Column | Description |
|---|---|
| Email Address | The user’s login email |
| First Name / Last Name | Display name as set in their profile |
| Job Title | As entered during invite or in their profile |
| MFA Security | Two-step verification method in use |
| ID | The user’s unique fleet ID |
| Joined Fleet | Date the user accepted their invitation |
| Last Login | Date and time of the most recent login |
| Login Count | Total number of logins |
At a Glance⚓︎
- Invite users: Assign permissions using presets or customize access
- Permission presets: Pre-configured roles (Developer, Fleet Manager, Operations Specialist, Support, Technician)
- Custom presets: Create your own permission templates for recurring roles
- Last Login & Login Count: See when a user last logged in and how many times — useful for identifying inactive accounts
Add Users⚓︎
- Open Administration → User Management from the main navigation.
- Go to the Users tab.
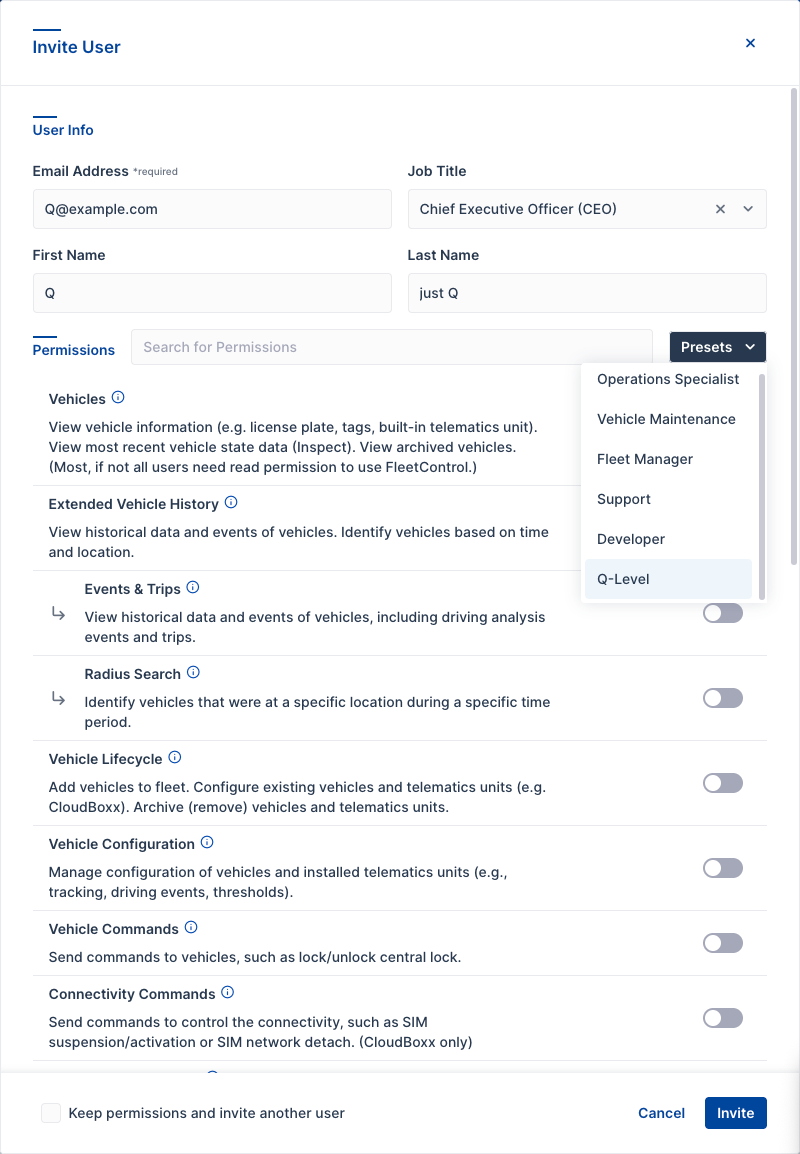
- Select Invite User.
- Enter the email address, job title, first and last name.
- Select a preset from the Presets dropdown or toggle individual permissions.
- (Optional) Check Keep permissions and invite another user to reuse the current permission selection.
- Select Invite.
Remove Users⚓︎
- Open Administration → User Management from the main navigation.
- Go to the Users tab.
- Select … → Remove.
- Confirm by selecting Remove again.
Edit Permissions⚓︎
- Open Administration → User Management from the main navigation.
- Go to the Users tab.
- Select … → Edit Permissions.
- Choose a preset or adjust permissions individually.
- Select Save.
Assign Permissions⚓︎
Select User Permissions to view and manage permission templates.
FleetControl includes default presets (Developer, Fleet Manager, Operations Specialist, Support, Technician) that you can use or customize for your organization.
Permission Presets⚓︎
Create a New Preset⚓︎
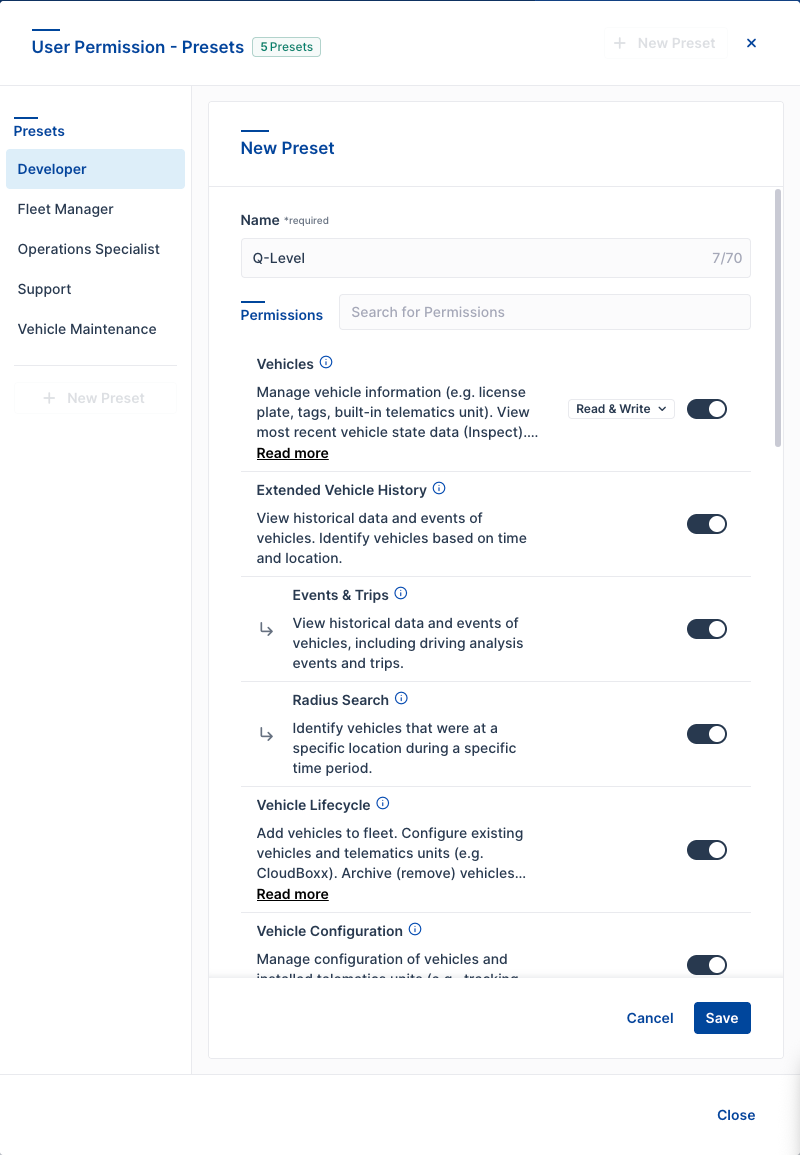
- Select + New Preset.
- Enter a descriptive name.
- Toggle permissions and set access levels (Read Only or Read & Write).
- Select Save.
Your new preset appears in the presets list and becomes available when inviting users.
Edit a Preset⚓︎
- Select the preset from the list.
- Select Edit.
- Adjust permissions using the toggles and access level dropdowns.
- Select Save.
Note
Editing a preset updates the template for future use but does not change permissions for users already assigned that preset. Update existing users through Edit Permissions if needed.
Available Permissions⚓︎
| Permission | What It Allows |
|---|---|
| Vehicles | Manage vehicle information (e.g., license plate, tags, built-in telematics unit); view vehicle data and archived vehicles (most users need read permission to use FleetControl). |
| Extended Vehicle History | See historical vehicle data and events, including driving and trips. |
| ↳ Events & Trips | View historical data and events of vehicles. Identify vehicles based on time and location. |
| ↳ Radius Search | Identify vehicles that were at a specific location during a specific time period. |
| Vehicle Lifecycle | Add vehicles to the fleet. Set up existing vehicles and telematics units. Remove (archive) vehicles and telematics units. |
| Vehicle Configuration | Manage vehicle and telematics unit configuration (e.g., tracking, driving events, thresholds). |
| Vehicle Commands | Send commands to vehicles, such as lock or unlock central lock. |
| Connectivity Commands | Control connectivity with commands like SIM suspension/activation or SIM network detach (CloudBoxx only). |
| Vehicle Offline Access | Grant offline access to vehicles (e.g., by creating CloudBoxx Bluetooth tokens). |
| FleetShare | Share your vehicles with other fleets. Manage vehicles shared with you by other fleets. |
| ↳ Share Vehicles | Share or revoke sharing vehicles with other fleets (this permission depends on FleetShare). |
| ↳ Return Vehicles | Return shared vehicles to their original fleet (this permission depends on FleetShare). |
| Fleet Settings | Manage settings for your fleet, such as speed limits and units of measurement. |
| Fleet Users | Manage users and permissions for your fleet. Invite and remove users. |
| API Clients | Manage API clients and permissions. Clients must integrate against INVERS OneAPI via REST. |
| Event Consumers | See event consumers and their credentials, as well as subscribed topics. Event consumers must use INVERS RabbitMQ queues. |
| Telematics Credentials | Manage credentials to OEM APIs (third-party telematics). |
| Vehicle Protection | View and manage cases of potential theft, fraud, and vandalism (permission is needed for the feature Anomalies). |
| Vehicle Archive | Permanently remove archived vehicles. |
| Vehicle Transfer | Transfer vehicles from one fleet to another and view the status of such vehicle transfers. You need this permission in both fleets (source and target) to transfer vehicles between them. |
Permission Levels (Read vs. Read & Write)
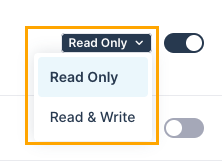
For some permissions, after you enable them a small dropdown appears.
Select Read-Only or Read & Write to set the access level.
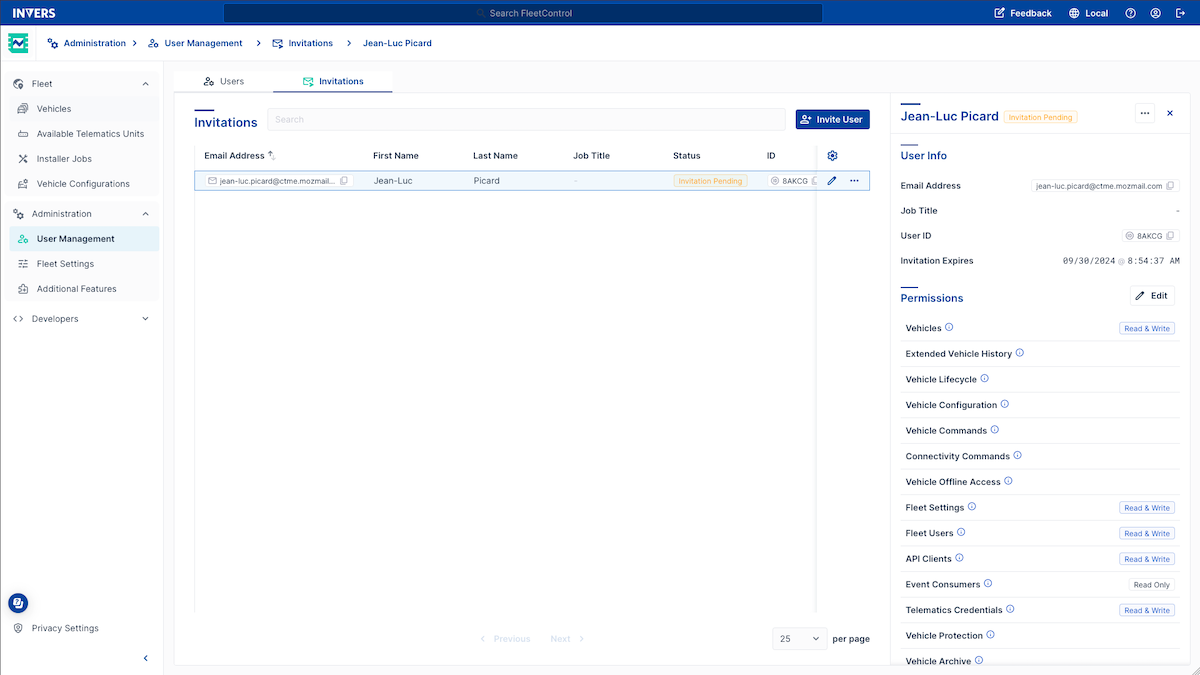
Manage Invitations⚓︎
Go to the Invitations tab to:
- View pending invites
- Edit pending invites
- Remove invites
Export Users⚓︎
Export the user table to a CSV file for external record-keeping, analysis, or compliance reporting.
To export users:
- Open Administration → User Management.
- Go to the Users tab.
- Select … → Fleet Users (CSV) → Export.
- Choose a location to save the file when prompted by your browser.
What gets exported?
The export reflects the current table view, including the configured table columns.