Mobility Provider
Overview⚓︎
Use Installer Jobs to manage CloudBoxx installations, configurations and maintenance jobs through installer companies, that can be external companies or your internal installation team. Grant installers temporary, job-specific access permissions to complete hardware tasks securely.
Benefits⚓︎
Installer Jobs lets you:
- Assign setup, configuration and maintenance tasks to installers.
- Set temporary access only for as long as the installer needs to complete the job.
- Monitor job progress in FleetControl.
- Specify configuration details for the CloudBoxx to ensure correct setup.
- Avoid sharing sensitive credentials.
Set up Installer Companies⚓︎
Invite an installer company to work with you and grant access to jobs in your fleet. An installer company can be an external contractor or an internal team in your company, responsible for installation and maintenance of hardware tasks like setting up a CloudBoxx in new vehicles. If you manage multiple fleets, send separate invitations. Only one invitation per fleet, per installer company is needed.
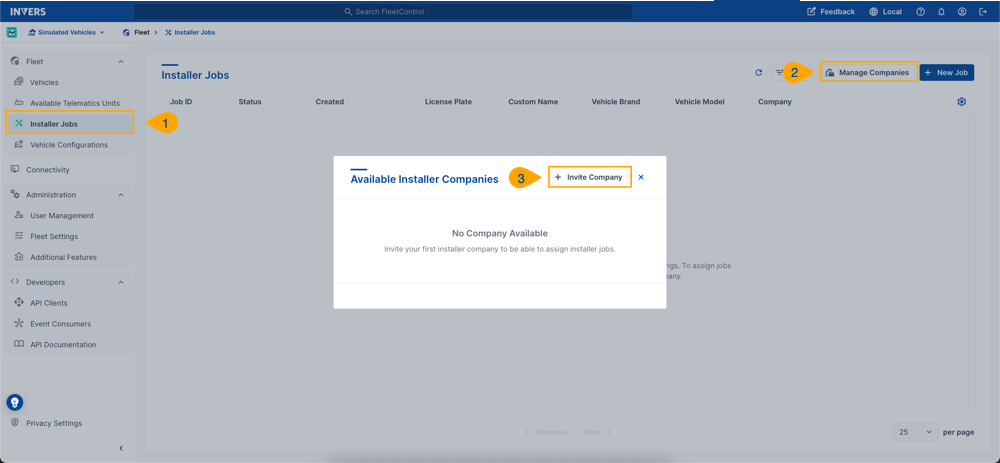

Follow these steps to invite an Installer Company:
- Navigate to Installer Jobs in the main navigation.
- Select Manage Companies.
- Click Invite Company.
- Enter the installation partner’s email address.
- Select Invite.
The status of the invitation remains PENDING until the installation partner completes the registration, then changes to ACCEPTED.
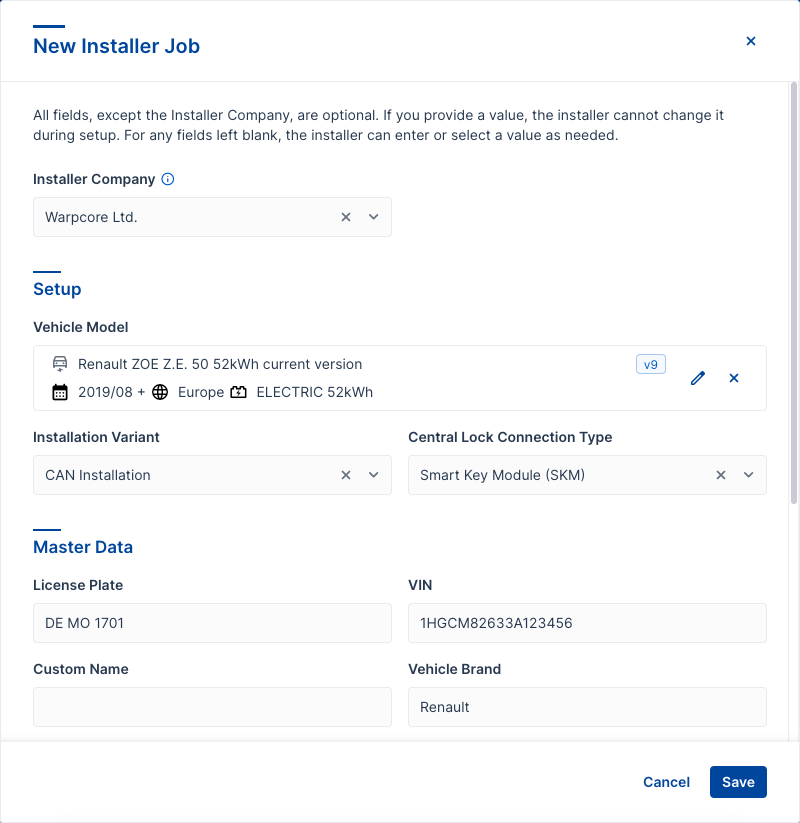
Create Installation Jobs⚓︎
Jobs typically involve installing or reconfiguring CloudBoxxes in vehicles. Installation Jobs allows the pre-configuration of CloudBoxxes so that the installer does not have to make configuration decisions in the workshop and misunderstandings and errors can be avoided.
Follow these steps to create installation jobs:
- Open Installer Jobs from the main navigation.
- Select New Job.
- Choose Create New Job or Select from Templates.
- Enter the job details.
- Optional: Select Save as Template if you want to reuse these job settings for future jobs. This saves your current settings as a template, so you can quickly create similar jobs later.
-
Save or Save & Assign.
- If you have not selected an installer company, click Save to keep the job as Pending. You can assign it later.
- If you have selected an installer company, click Save & Assign to assign the job immediately.
Bulk Import
Need to create 10+ jobs at once? Use the CSV Import to import up to 1,000 jobs in minutes.
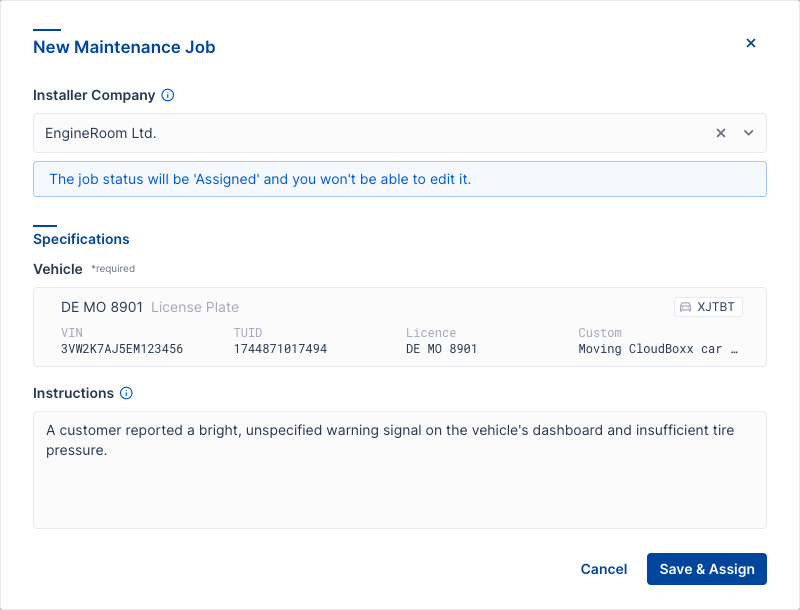
Create Maintenance Jobs⚓︎
Manage vehicle maintenance, servicing, and repairs with ease. Assign jobs and provide temporary access for inspections, preventive care, and timely repairs.
Follow these steps to create a new maintenance job:
- Open Installer Jobs from the main navigation.
- Choose the Maintenance Jobs tab.
- Select New Job.
- Enter the job details.
- Save or Save & Assign.
- If you have not selected an installer company, click Save to keep the job as Pending. You can assign it later.
- If you have selected an installer company, click Save & Assign to assign the job immediately.
Use Templates⚓︎
Templates make it easy to create and manage recurring installation jobs. Use templates to save time and ensure consistency for jobs with similar settings. You can edit, delete, duplicate templates, or quickly generate new jobs from them.
Create a Template⚓︎
Follow these steps to create a template for installation jobs:
- Open Installer Jobs from the main navigation.
- Select the Templates tab.
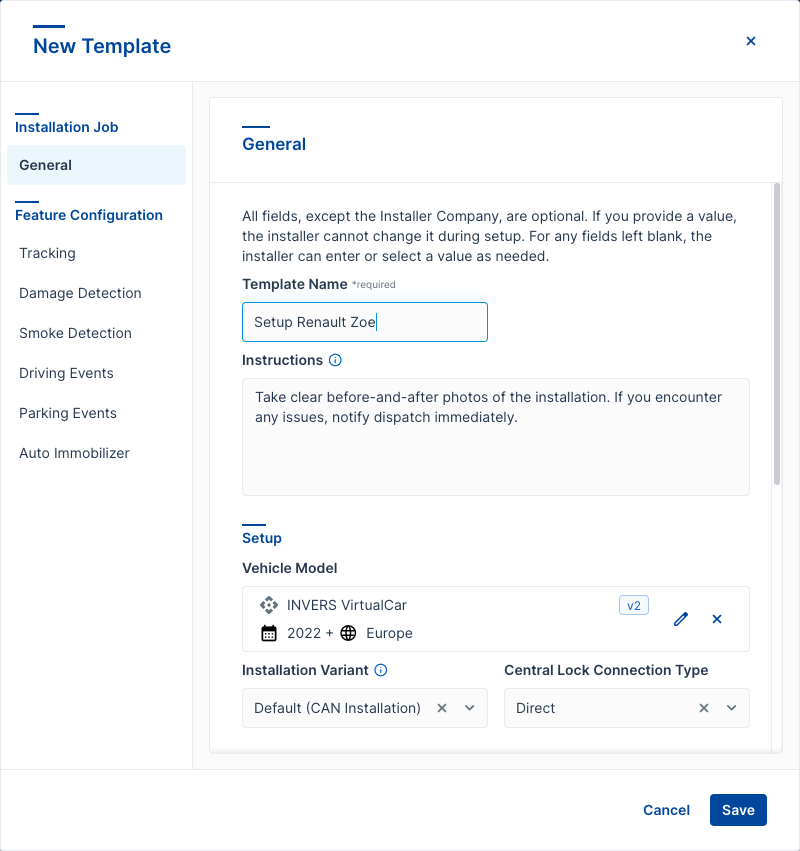
- Click New Template.
- Enter a Template Name.
- Fill in the job data as needed.
- Click Save to save the template.
Tip
You can also create a template while setting up a new installation job. Just activate Save as Template before saving the job. After saving, you will be asked to enter a name for the template. Then, click Save as template to add it to your templates list.
Use a Template⚓︎
Use these steps to apply a template for installation jobs—perfect when you’re adding many vehicles of the same model to your fleet:
- Open Fleet → Installer Jobs from the main navigation.
- Choose the Templates tab.
- Select the template you want to use.
- Open the dot menu ….
- Select Create New Job.
- Follow the steps described under create installation jobs.
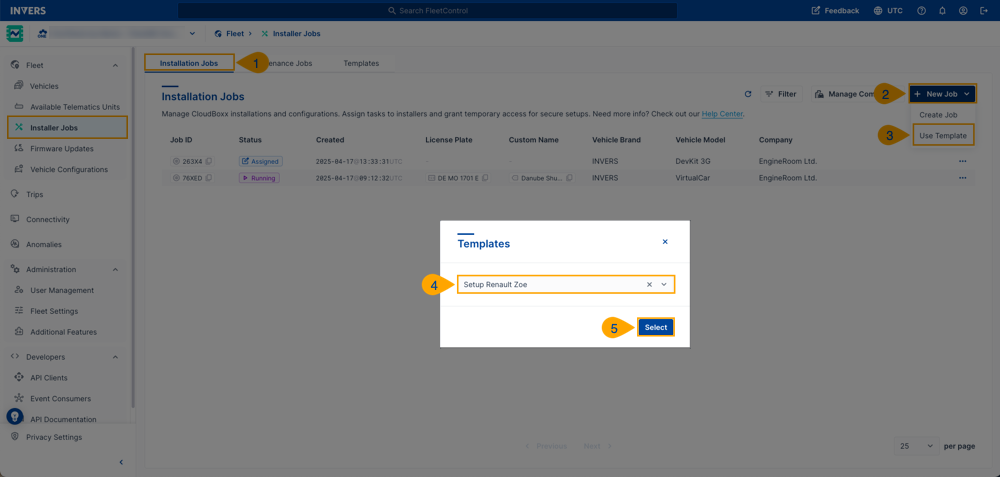
You can also use a template in the Installation Jobs (1) tab. Got to New Job (2) → Use Template (3) and select a template (4) from the drop-down menu:
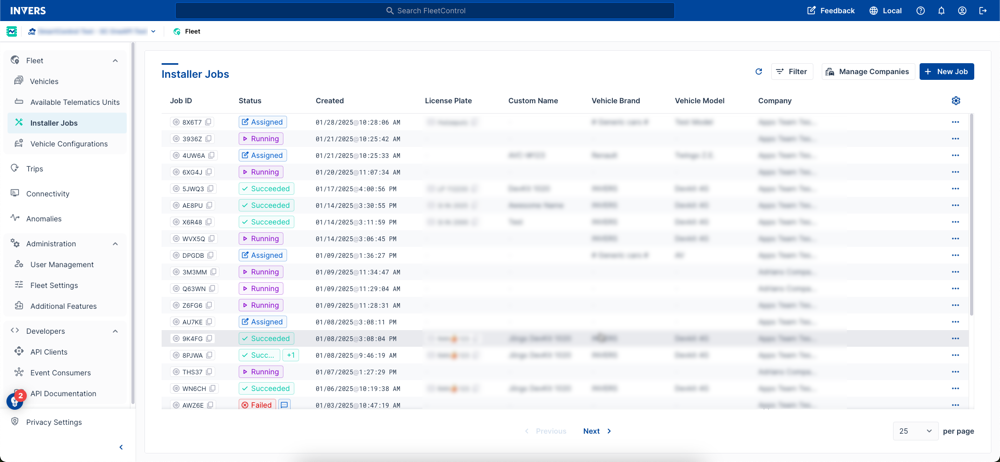
Monitor Jobs⚓︎
Customize the table view to your needs using the Configure Table Columns under the gear icon, or Filter to view only FAILED jobs for example.
Edit, Duplicate or Delete Jobs or templates⚓︎
Open the dot menu … to the right to edit, duplicate or delete a job or template. A job can no longer be edited or canceled, if it is assigned to an installer company.
Job Status⚓︎
Look for these status indicators to monitor your installations:
- PENDING: You can still edit this new job.
- ASSIGNED: Installers can now access this job.
- RUNNING: An installer is working on this job.
- SUCCEEDED: The installer has completed this job successfully.
- FAILED: The installer couldn’t complete this job (includes their explanation).
Security
Access to the vehicle ends automatically upon job completion. No additional security steps required.