Viewing Events
Use the Events page to review what happened with a vehicle. You can filter events, explore the route on a map and timeline, and export data.
Open the Events page:
- Go to Fleet → Vehicles → Table → Show Events for a vehicle, or
- From a vehicle’s Inspect page, select Events.
Looking up a specific event?
Use the icon or event name to identify it in the Events Reference lookup page.
Quick start⚓︎
- Filter → pick Time Range and Event Type(s) → Apply Filter.
- Scan the List on the left → select an event.
- Map + Timeline focus your view.
- Detail Panel shows location, related events, raw data, and Initiated by.
- Export filtered results if you need to share.
Hide Vehicle States
In the filter, enable Hide Vehicle States (called Hide Trackings for CloudBoxx API customers) to focus on key changes.
Page layout⚓︎
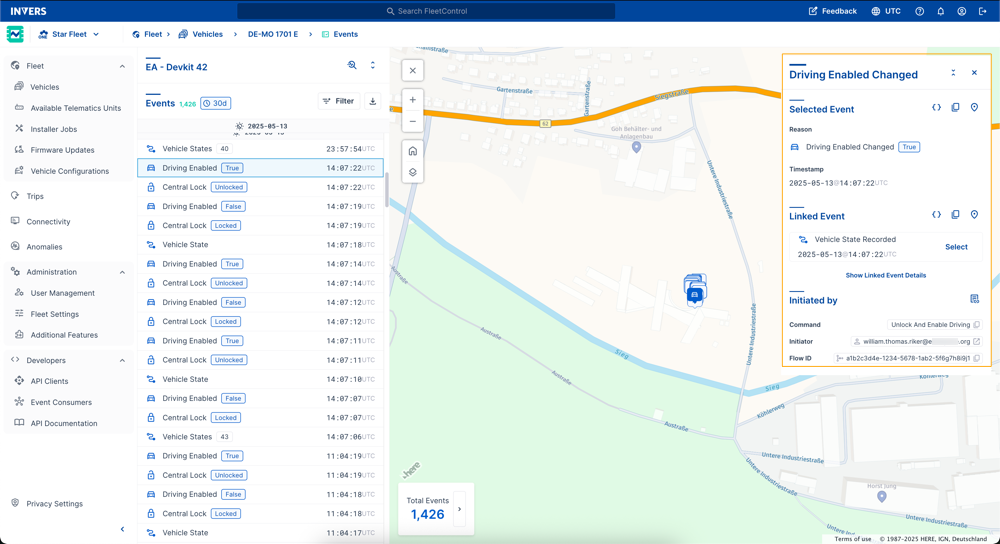
The Events page has four working areas you use together:
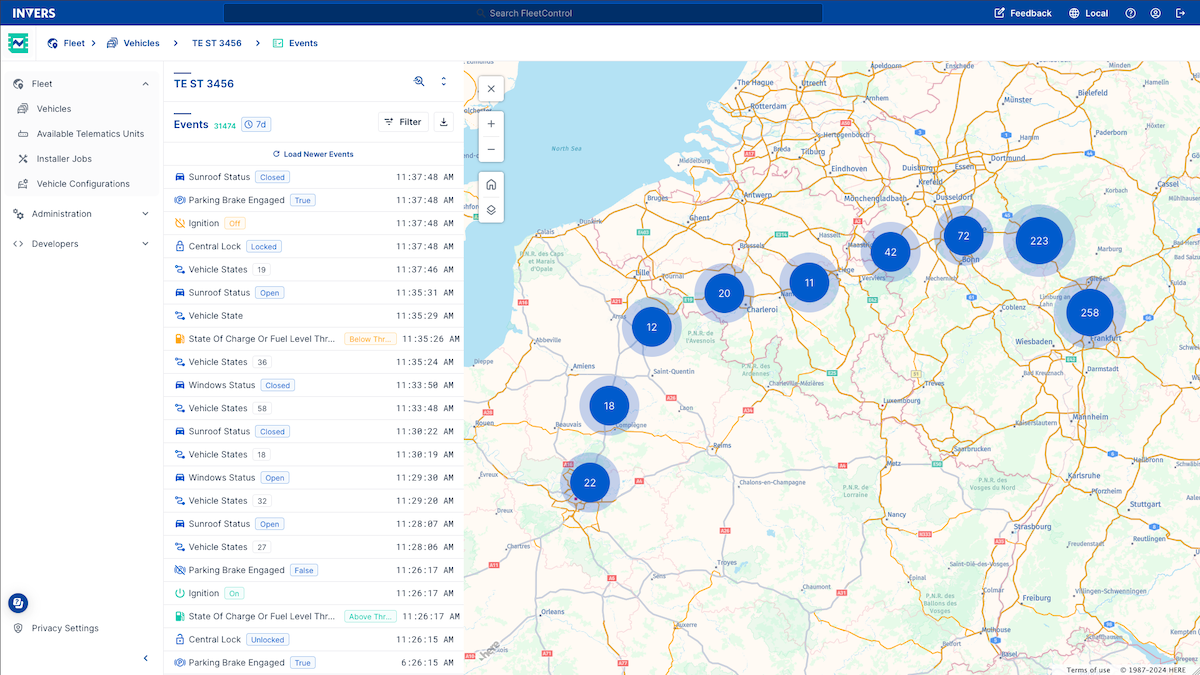
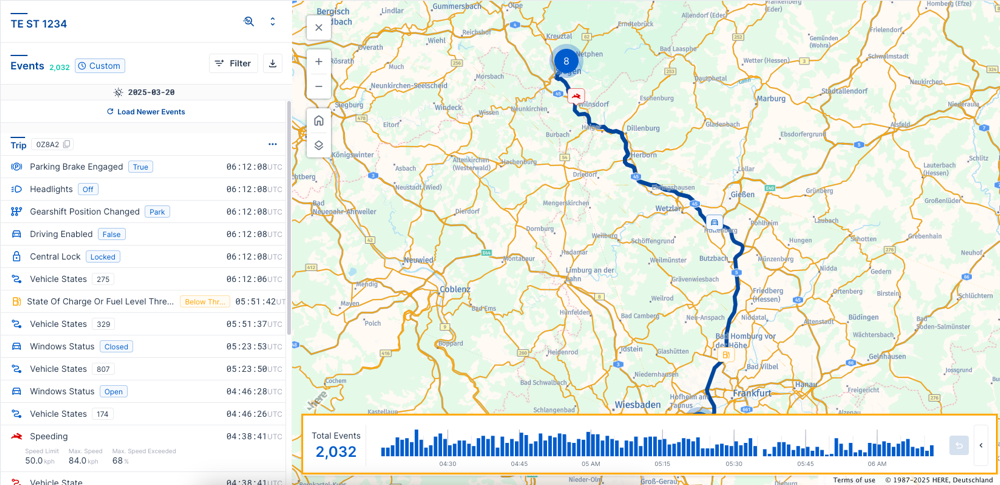
Event list (left)⚓︎
- Sorted by newest first; scroll for older entries.
- Shows your active filters as tags.
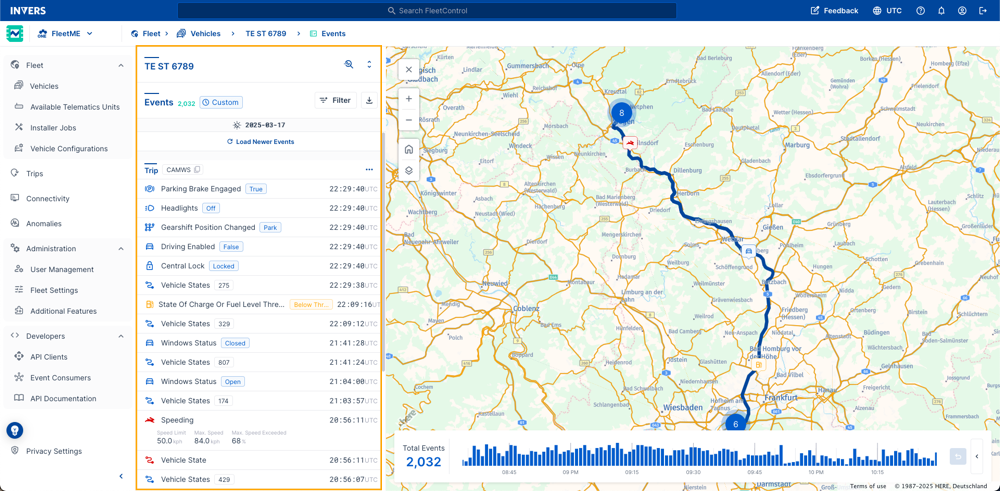
Map (center)⚓︎
Displays events as points or as a route when tracking is available. Clustered dots indicate dense areas of events.
For map navigation controls (zoom, satellite view, POIs, home), see User Interface.
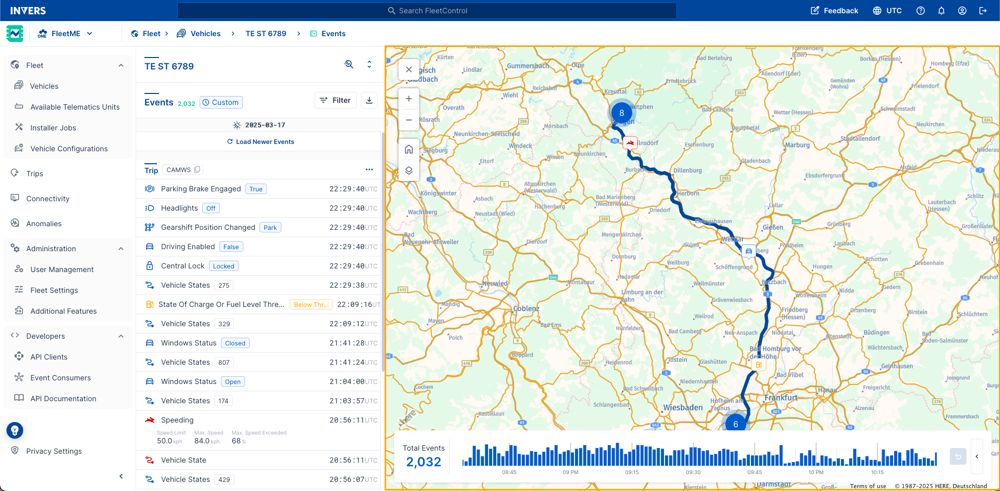
Timeline (below map)⚓︎
- Each bar is a time bucket for your filtered period.
- Select a bar to drill into a 5‑minute window; the map and list sync to that interval.
Detail panel (right)⚓︎
Opens when you select an event. For general information about side panels, see User Interface.
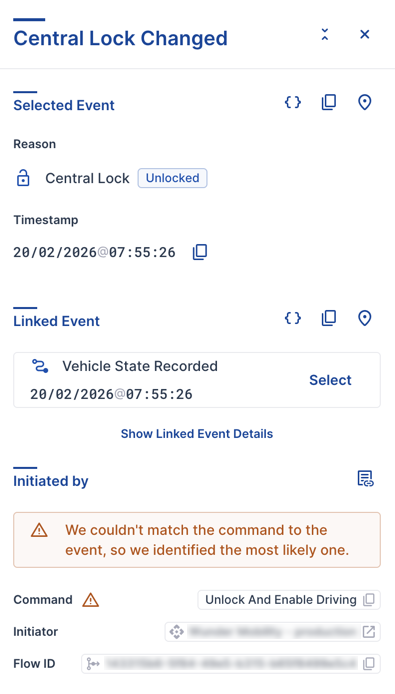
The panel shows:
- Selected Event — Reason and timestamp
- Linked Event — Related event (e.g., Vehicle State Recorded)
- Raw values — Speed, Mileage, State of Charge or Fuel Level, Central Lock, Driving Enabled, Ignition, Doors Status, Onboard Voltage, GNSS Speed over Ground, Supply Voltage
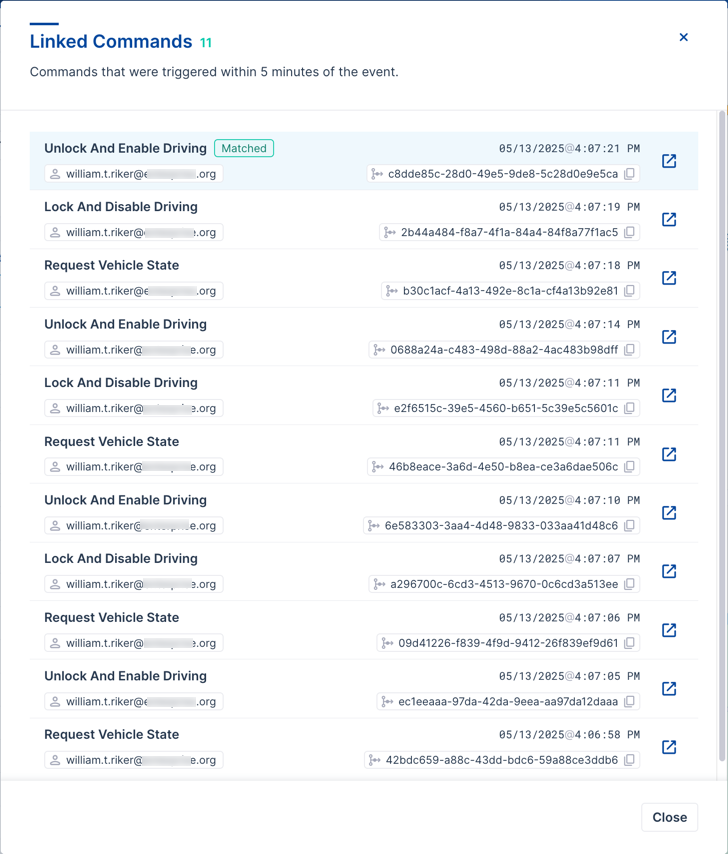
- Linked Commands — Commands sent within 5 minutes of the event
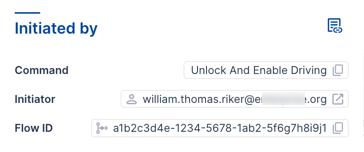
- Initiated by — Who or what triggered the action
Filter⚓︎
Open Filter to control what you see. For general information about filtering, see User Interface.
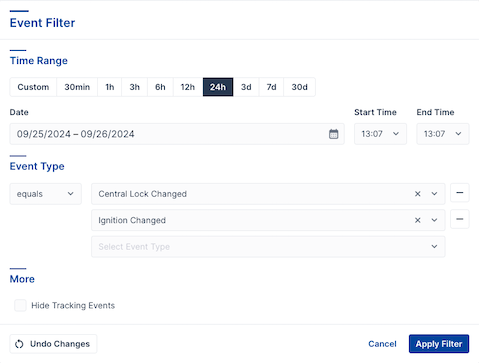
Filter options:
- Time Range: 30 min, 1 h, 3 h, 6 h, 12 h, 24 h, 3 d, 7 d, 30 d, or set a custom date + start/end time.
- Event Type: Add one or more event types.
- Hide Vehicle States (CloudBoxx API: Hide Trackings): Focus on key changes by hiding routine state updates.
Actions:
- Apply Filter — Run the search
- Undo Changes — Reset the modal
- Cancel — Close without applying
Find just the important changes
After choosing a time period, select only the event types you care about (e.g., Ignition Changed, Central Lock Changed). For a full list of event types, see Events Reference.
Initiated by⚓︎
Use the Initiated by section of an event to answer questions like “Which user triggered Event X at Time Y?”
| Initiator | Description | Reference |
|---|---|---|
| User | FleetControl user action through the web interface. Shows the user’s email address. Requires Fleet Users permission. | User Management |
| Client | API client command (e.g., booking app). Shows the configured client name. Requires API Clients permission. | API Clients |
| Bluetooth | Direct communication with the CloudBoxx via Bluetooth. | Bluetooth Integration |
| RFID | Access card held to MultiCardReader to unlock or lock the vehicle. | RFID MultiCardReader |
| AutoImmoLock | CloudBoxx automation rule executed — for example, automatically locking an unattended vehicle. | Auto Immobilizer Control |
When the initiator can’t be identified directly⚓︎
FleetControl identifies the initiator directly when the event and its triggering command share a Flow ID. When an event has no matching Flow ID, two other states can appear in the Initiated by section.
-
Most Reasonable — No matching Flow ID is available, but a time-based match can still be made. FleetControl looks at API requests in the relevant time window around the event and marks the closest match.
Example: When a Central Lock command is sent, the CloudBoxx triggers the lock and then reads the resulting state from the vehicle via CAN bus. Because triggering the lock is a physical action that takes time, the state read arrives after the command. FleetControl bridges this delay using the time window to identify the most likely initiator.
Most Reasonable state in the Initiated by section -
This event has no associated command or initiator. — No link could be established between this event and its trigger — not even a time-based one. The event is logged correctly and does not indicate an issue with your fleet operations.
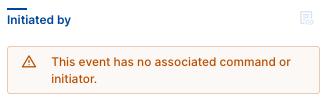
No initiator state in the Initiated by section
Linked commands⚓︎
Sometimes commands and events occur close together. Select the lookup icon to open Linked Commands—this lists all commands sent within 5 minutes of the selected event. Use this to see the full context around an event, including related actions that happened before or after.
Exporting data⚓︎
Export the currently filtered events and tracking data as a file—ideal for sharing with authorities or support teams. For general information about exporting, see User Interface.
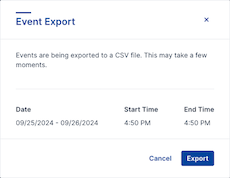
- Select the Download icon next to Filter.
- In Event Export, select Export to compile and download.
- The file is saved to your browser’s downloads folder, named:
events_<vehicle-plate>_<date>_<time>.csv
What gets exported?
The export includes all events matching your current filters (time range + event types + options).
Common tasks⚓︎
Expand a category to view the example.
Find a specific lock/unlock incident
- Open Filter → set the Time Range around the suspected time.
- In Event Type, select Central Lock Changed (and optionally Driving Enabled Changed).
- Apply and review the list; select an event to see Initiated by and Linked Commands.
Review a trip segment with unusual activity
- Filter to the relevant day.
- In the Timeline, select the bar that covers the time the activity occurred.
- The map and list sync to that 5‑minute window.
Cut noise from tracking/state updates
- Open Filter.
- Enable Hide Vehicle States.
- Apply; you will see mainly change events.
Related articles⚓︎
- User Interface — Maps, filters, side panels, and common controls
- Events Reference — Complete list of event types and vehicle states
- Inspect — Vehicle details, commands, and diagnostics
- Trips — Trip-based view of vehicle activity