Available Telematics Units
Manage CloudBoxxes assigned to your fleet but not currently installed in vehicles. This includes new inventory and units removed from vehicles.
Overview⚓︎
CloudBoxxes appear in Available Telematics Units for two reasons:
- New inventory: Delivered units not yet installed in vehicles.
- Uninstalled units: CloudBoxxes removed through SmartControl’s “replace telematics unit” feature or when a vehicle was archived.
Units in this list don’t have an Inspect page, and you can’t send commands to them through FleetControl or the Vehicle Commands API. They’re still accessible using the CloudBoxx API directly.
If a CloudBoxx appears here by mistake and is actually installed in a vehicle, perform a setup using the APIs, SmartControl or the Add Vehicle feature. The unit will be associated with that vehicle and removed from this list.
Table view⚓︎

| Column | Description |
|---|---|
| Telematics Unit ID (QNR) | The telematics unit main identifier. For CloudBoxxes, this is the QNR |
| Serial Number | The secondary identifier of the telematics unit (serial number in case of the CloudBoxx) |
| Main Firmware Version | The firmware version the telematics unit is currently running on |
| Telematics Unit Model | The model of the telematics unit (e.g., “4G”, “1020”) |
| Telematics Unit Variant | The model variant of the telematics unit, if there are different variants available |
| Last Contact | Date and time that the telematics unit last communicated |
| Tags | Organization labels you’ve applied |
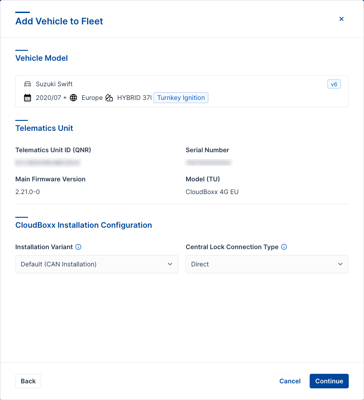
Add vehicle⚓︎
To quickly connect a CloudBoxx from your inventory:
- Open Available Telematics Units.
- Select the telematics unit.
- Select Add vehicle
 .
. - Choose the appropriate vehicle model.
- Select the values for the CloudBoxx Installation Configuration.
- (Optional) Enter Vehicle Information and Details.
- Select Save.
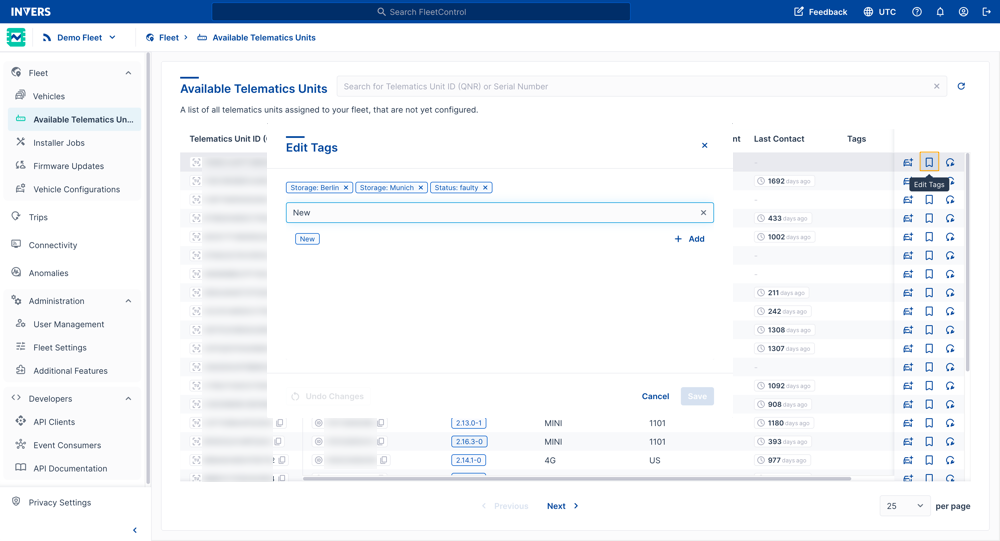
Edit tags⚓︎
Tags let you label telematics units to keep your inventory organized. Use tags to group items by location, status, or any other category you choose.
To edit tags:
- Select Edit Tags on the unit you want to update.
- Enter the label you want to add.
- Select Add to attach the tag.
- Save your changes.
Reset telematics unit⚓︎
Remove all vehicle-specific configurations from a CloudBoxx.
To reset a unit:
- Select the reset icon
 for the unit.
 - Select Reset to confirm.
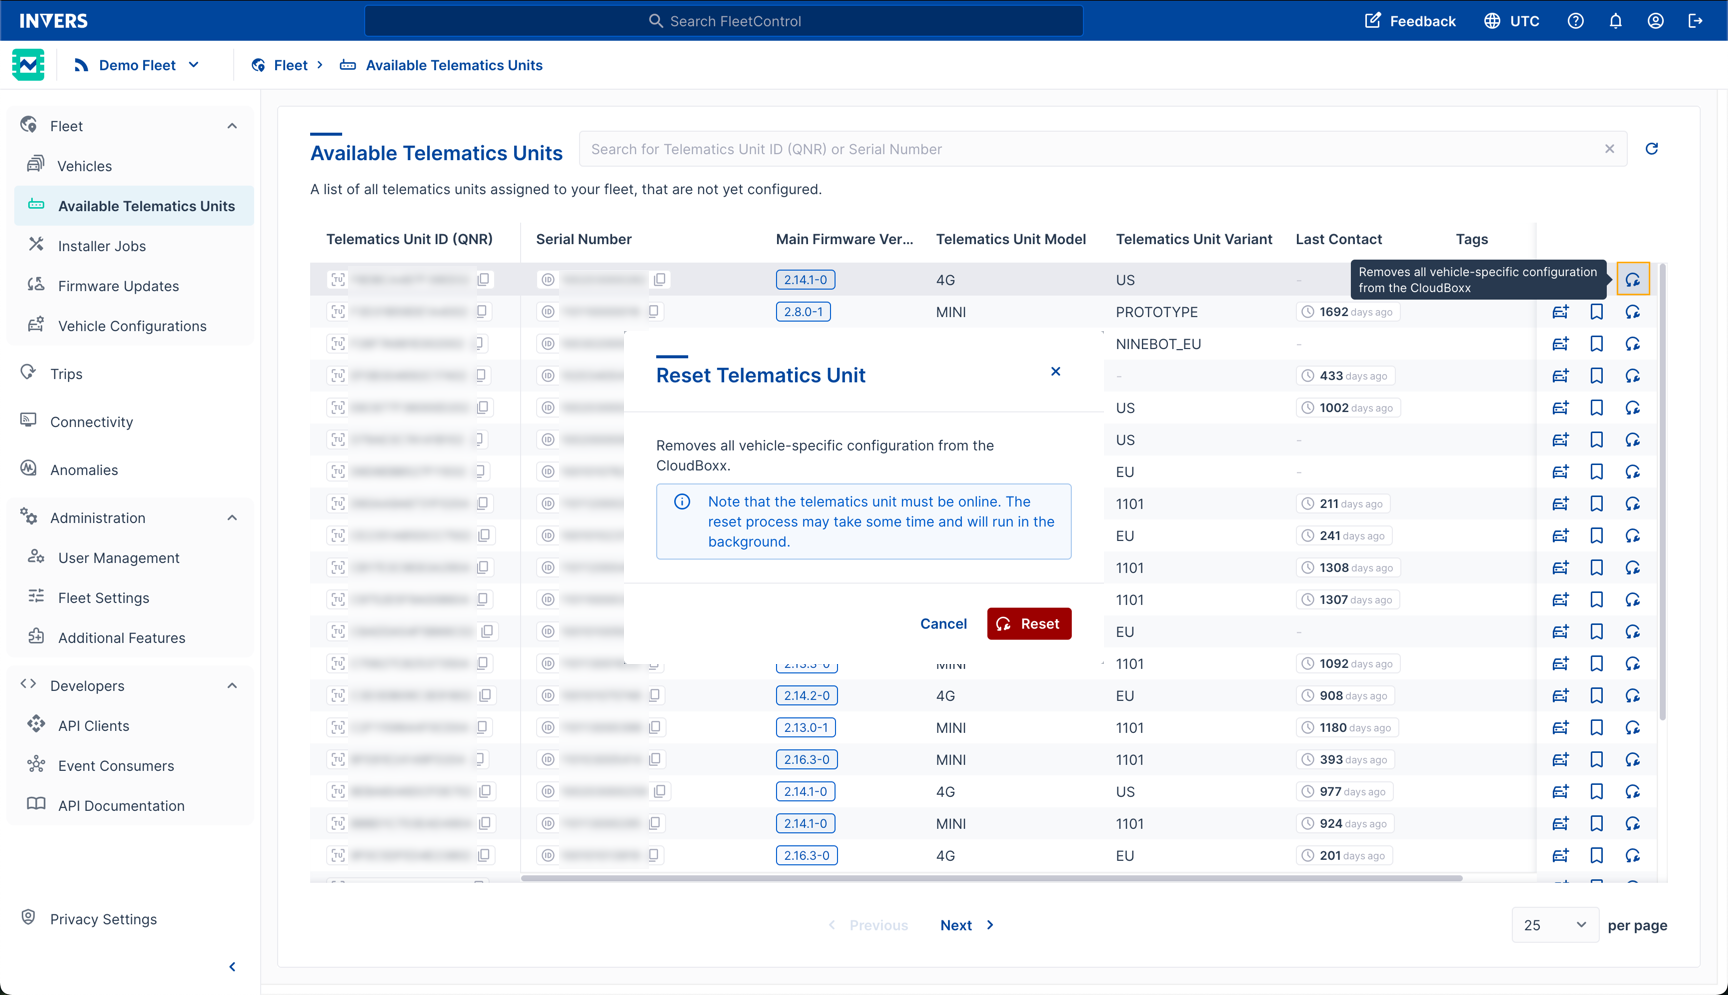
The reset process runs in the background and may take some time.
Note
Make sure the telematics unit is online to reset all vehicle-specific configurations. A config reset is only necessary to troubleshoot issues, but is not generally required.
Export telematics units⚓︎
Export all Available Telematics Units to a CSV file for external analysis or inventory management.
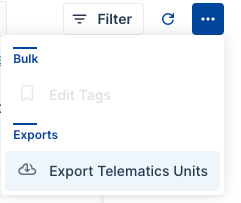
To export:
- Select the dot menu (⋯) in the top-right corner.
- Choose Export Telematics Units.
- Review or modify the auto-generated filename.
- Select Export.
The export includes all available telematics units with these columns: Telematics Unit ID, Serial Number, Main Firmware Version, Model, Variant, Last Contact, and Tags.